Fire Blade Vortex Assassin Gear, Jewels & Flasks
Summary – TL;DR
As per usual, nothing matters more than capping your Elemental Resistance before anything else. This means modifiers on gear are subordinate to Resistances as long as you’re not capped. Since you’ll be running a decent amount of Unique items, it’ll be important to look out for a lot of resistances on your Rare pieces!
We’re providing you with an extensive analysis further down the page but chose to start off with an overview / recommendation.
Our recommendation:
| Item Slot | Item Name |
| Head |  Hubris Circlet with a Power Charge, an extra Unleash Seal and Aspect of the Spider Hubris Circlet with a Power Charge, an extra Unleash Seal and Aspect of the Spider |
| Amulet |  Xoph's Blood Xoph's Blood |
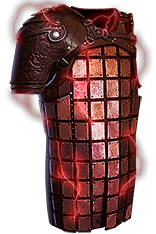
| Chest |  Inpulsa's Broken Heart Inpulsa's Broken Heart |
| Gloves |  Storm's Gift with implicit conversion Storm's Gift with implicit conversion |
| Boots | Two-Toned Boots with 30% Movement Speed, high Life & Resistances |
| Belt |  Leather Belt with high Life and Resistances Leather Belt with high Life and Resistances |
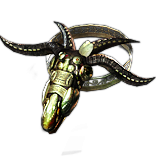
| Rings | 2x  Circle of Anguish Circle of Anguish |
| Weapon | 2x  Void Battery Void Battery |
For crafting Rare items, you can check out all the affixes that can roll on an item base, depending on its level, influence, and many other factors, using our affix tool.
Armour Pieces
Helmet
Starting off with a Helmet, we immediately arrive at the most complicated item in the build to acquire. Ideally, you want to use an  Awakener's Orb to get “+1 to Maximum Power Charges and the “Skills supported by Unleash have +1 to maximum number of Seals” modifiers. Additionally, you’re looking for Life, Resistances and potentially an Aspect of the Spider craft. This Aspect can be crafted on any Rare item in the build with an open suffix. The best way to do that is to a
 Awakener's Orb both modifiers together and then either get lucky or hit a couple of
  Orb of Annulments to achieve a base you can craft on. When you can’t afford a Helmet like this, you can just run a regular Life, Elemental Resistance Helmet.
- +# to Maximum Power Charges
- +# to Maximum Life (at least 70)
- Skill supported by Unleash have +# to maximum Seals
- Elemental Resistances

Body Armour
 Inpulsa's Broken Heart is the cornerstone of your build. You don’t require a 6-Link as this build can start of fairly easy on a 5-Link. Obviously, as content gets tougher, you would really like to obtain a 6-Linked version of the chest piece. This body armour is what offers the builds explosions, so it can’t do without it.
- +# to maximum Life (at least 70)
- #% increased Damage if you’ve Shocked an Enemy Recently
- #% increased Effect of Shock
Gloves
This is the second mandatory Unique in this build.  Storm's Gift is a pair of Gloves that stems from the Synthesis League and therefore has an implicit Synthesized modifier. This modifier should be “#% of Physical Damage converted to Fire Damage”, as you are missing a last piece of Conversion to maximize your damage output. Since you’re allocating Avatar of Fire, all non-converted damage is lost entirely.
- #% of Physical Damage converted to Fire Damage (25)
Boots
Second item on our list of Rare items! Ideally you want a pair of Two-Toned Boots as they provide up to 24% Additional Resistances which is really nice. Additionally, since we play an Assassin and we like to be fast, we really want to find high Movement Speed and Life.
- #% Increased Movement Speed (25+ but ideally 30)
- +# to maximum life (at least 75)
- +# to Elemental Resistances (enough to cap)

Belt
This is a very versatile slot. Since you require as much life as possible I opted to suggest a  Leather Belt. Make sure to pick one up with as much Life as possible and some resistances as you will need to get those plentiful if you want the most out of your other pieces of gear.
- +# to maximum Life (120)
- +% to Elemental Resistances (80)

Accessories
Amulet
 Xoph's Blood is too good to pass up on. It saves you a Skill Point, as it gives you Avatar of Fire. Additionally, it provides you with Increased Maximum Life, Strength and 10% Fire Penetration. Lastly, it makes enemies get covered in Ash when they hit you, which is as much as a 20% more damage multiplier. It is a must-have for a Fire Build like ours!
You need to anoint Magmatic Strikes to take care of your Physical Damage conversion to Fire. Without that, a lot of your damage gets converted into nothingness and just gets lost.
Anoint
You need to anoint Magmatic Strikes to take care of your Physical Damage conversion to Fire. Without that, a lot of your damage gets converted into nothingness and just gets lost.
Rings
This is where things get a little tricky. You’re definitely running double  Circle of Anguish, but the modifiers you’re going to pick depend a lot on your budget and the other pieces of gear. If your resistances and budget can deal with it, you most definitely want the following Herald of Ash modifiers on both of them:
- Herald of Ash has #% increased Buff Effect
- #% Increased Fire Damage while affected by Herald of Ash
Now, I imagine these are out of your price-range as it requires exquisite Rare pieces to cope with the lack of Resistances and those two modifiers combined easily go into the 20ish Exalts per ring range. Therefore, I suggest you pick up one of them, combined with a  Circle of Anguish that has the following two modifiers:
- Herald of Ash has #% increased Buff Effect
- +#% to Fire Resistance while affected by Herald of Ash
Weapon
This is another Unique slot. The two  Void Batterys are helping your Power Charges carry your damage. Since you’re stacking a lot of these, Void Batteries are hard to contest.
Flasks
I believe flasks are highly preference-based. One isn’t just outright better than another one for specific / certain builds. Obviously, sometimes, there’s a set in stone set of Flasks you should be using just because they synergize with your build so well. I wouldn’t say those really exist in this setup, but I’d strongly advise you to stick with the setup listed here.
For starters, you can’t go without a  Diamond Flask. It gives you approximately 22% effective Critical Strike Chance. Diamond Flasks are just impossible to pass up on when playing Critical Strike builds.
Next up, the most vital part of your Flasks is most likely the  Cinderswallow Urn. Since you’re going to be using
  Wave of Conviction on bosses and it has approximately 95% Chance to Ignite, you will activate this Flasks secondary upside which is the increased damage dealt to ignited Enemies. Obviously, as a first reasoning, Cinderswallow offers you tremendous amounts of sustain through killing monsters while mapping and provides you with everything you need to blast through maps when it comes to sustain. You ideally want to find one with “Increased Critical Strike Chance during Flask Effect”. If they are too expensive, just get whichever one.
For your utility flasks, my recommended setup will have a  Quartz Flask, and a
  Quicksilver Flask. I think a Quartz Flask fits the build very well as you’re trying to make sure to Dodge a lot and then survive the one shot if you get hit. Your last flask should most likely either be a
  Divine Life Flask as there’s not enough sustain to not run a Life Flask in this build.
In the Path of Building mentioned before I used an Enduring Eternal Mana Flask of Heat to replace the  Quartz Flask as I feel like this is an upside on Bosses to not have to worry about Mana while maintaining 10 Stacks. This is not a necessity and is more of a preference, but I felt like I wanted to include it.
Regardless of which utility Flasks you go for and whether you follow our recommendations or not, you’ll need to stick to the suffixes we have picked for you (Staunching, Heat, Warding). The affixes on your non-unique Flasks can be changed around, but I recommend the following setup (based on the Flask duration, charges, and affix priorities):
Our recommendation:
| Slot | Flask |
| 1 |  Cinderswallow Urn with Increased Critical Strike Chance Cinderswallow Urn with Increased Critical Strike Chance |
| 2 | Bubbling Divine  Divine Life Flask of Staunching Divine Life Flask of Staunching |
| 3 | Alchemist’s  Quicksilver Flask of Adrenaline Quicksilver Flask of Adrenaline |
| 4 | Chemist’s  Diamond Flask of Warding Diamond Flask of Warding |
| 5 | Chemist’s  Quartz Flask of Heat Quartz Flask of Heat |
Be sure to check out our Flask Crafting Guide to learn everything you need to know about how to set up your non-Unique flasks.
Jewels
Cluster Jewels
If you are looking for the most optimal way to acquire your Cluster Jewels, or have any other questions whatsoever about them, such as how to craft or price them, we refer you to our complete guide on Cluster Jewels.
Cluster Jewels are an important way of scaling Area of Effect in this build which makes the explosions “reach” further and thus have a higher chance of chaining more. This is achieved through using 4 Medium Cluster Jewels of which 2 with Towering Threat and Vast Power. The combination of those gives you 40% Increased Area of Effect ideally per Cluster Jewel but sadly is capped. For your last two Cluster Jewels, you should divert to using Towering Threat and Magnifier notables!


Now, to be able to run four Medium Clusters, you will need two Large Cluster Jewels. I would advise you to pick up at least one Arcane Heroism notable on them. Besides that, you always want to pick up Large Cluster Jewels with three notables in total so you can efficiently pick up the first two. This is because the way notables shuffle on a Cluster Jewel depending on how many passives it has. Options that you could consider picking are Lord of Drought, Prismatic Heart, Widespread Destruction, Essence Rush, Practiced Caster and basically anything that feels any useful to your build.


Lastly, you’ll be running a single Small Cluster jewels in  Calamitous Visions. This grants you the Lone Messenger keystone which allows you to further scale your Herald of Ash and help it deal damage to further help Inpulsas explosions to kill monsters and thus chain!
Regular Jewels
I chose to keep the regular jewels rather simple. You need % increased maximum Life on all of your jewels to reach respectable amounts of Health. Additionally, the best rolls are Critical Strike Multiplier (while Dual Wielding, as this rolls the highest %). Since double critical strike multiplier jewels are generally really expensive, I’ve used only a two-stat Jewel. Feel free to pick up a third relevant roll like Spell Damage, Critical Strike Multiplier, Physical Damage, Damage, Resistances, …


